Archives for posts with tag: america’s test kitchen

it has become a bit of a tradition to have an ‘orphans’ thanksgiving at my place for a few years now. i start with the usual list of friends, but anyone is invited, and there are always a few last minute add ons. this year it tipped the scales with almost 20 guests. from shopping at the farmers market all the way to the leftovers, here is the feast in photos:

the farmers market fairy delivered this 18+ lb beauty on monday:

i did a majority of my shopping at the wednesday morning santa monica farmers market:

on my way to the market, kcrw had a wonderful segment with christopher kimball, of america’s test kitchen and cook’s illustrated, talking about a julia child thanksgiving. of course he spoke of her simplicity and her use of the best ingredients. it was just the motivation and inspiration i needed. this is the beautiful and colorful loot i came home with:

the pie prep: cranberries, rhubarb, and roasted pumpkin.

the veggie prep: roasted winter vegetables, roasted garlic mashed potatoes, and creamed corn with crispy bacon.

the free range willie bird all buttered up, stuffed, and carved to perfection:

the buffet: the aforementioned creamed corn with crispy bacon, garlic mashed potatoes, roasted winter veggies, along with sausage + fennel stuffing, and gravy. my guests brought sweet potatoes, green beans, carrots, salad, cranberries and homemade bread.

the table as people were plating up their food:

the pies: cranberry rhubarb (as well as, a crisp from the extra fruit) and pumpkin. not shown: pumpkin cheesecake and paleo pumpkin bread.

the dead soldiers the next day:

a few of us took off for big bear the next afternoon to just chill out (and digest) for a couple of days. these were some of the leftovers by the fire at the little cabin in the woods the next night:

i made stock from the carcass yesterday, and there was just enough turkey leftover to make soup today. recipe to come…

note: more (professional) photos from the evening can be found at rafiel chait photography. the photos above were just taken by me with my crummy iphone and hipstamatic.

last year i was introduced to the independent shakespeare company. i saw quite an enjoyable version of the merry wives of windsor, and if you can believe it, a somewhat humorous hamlet. they have had a few venues over the years, but as of 2010, they put on their wonderful performances under the magic hour, moon, stars, and sometimes howling coyotes of los angeles summer nights at the old griffith park zoo.

their audiences are encouraged to bring blankets, chairs, coolers and picnic baskets filled with snacks and libations to enjoy before and during the performances. sometimes i just bring an assortment of meats, cheeses, veggies, bread, olives and salad. wine is a no-brainer.

to kick off the 2012 season for the winter’s tale, i decided on making fried chicken (ala america’s test kitchen) and macaroni salad (ala omnivorous) to accompany the usual suspects mentioned above, and the pinot noir from red car wine was perfect.

…so was the performance, and evening.

this season of isc runs til september 2, 2012. shows are thursday-sunday starting at 7p. make sure to catch all three plays: the winter’s tale, a midsummer night’s dream, and the comedy of errors. all performances are free. donations are strongly encouraged (by me, but i’m sure they approve of them too).

it’s tomato season! that, and our national heat wave, makes me think of delicious and refreshing gazpacho. i can’t remember how old i was (probably early teens?) when i first learned of cold soup. i was with my dad in nyc during an especially hot summer, and gazpacho was on the menu. he told me that it can vary depending on the freshness of the tomatoes, ingredients used, and done wrong will just taste like salsa, or worse, like cold campbell’s soup. i was intrigued. i ordered it, and it was amazing.

as a cook’s illustrated recipe tester, i made their authentic spanish gazpacho last year and fell in love with the recipe. it reminded me of that first time. they have adjusted it a bit from the test version, and it can be found on the america’s test kitchen website as creamy gazpacho andaluz. there is also a video.

i have made a couple of minor changes:

ingredients:

  • 3 pounds ripe tomatoes, cored
  • 1 medium cucumber, peeled, halved and seeded
  • 1 medium green pepper (i used a sweet hungarian this time, which is white in color, and like a milder green pepper, but depending on your taste any type of bell pepper will work.)
  • 1 small red onion, peeled and halved
  • 3 medium garlic cloves, peeled and quartered
  • 1 small serrano chile, stemmed, halved lengthwise (and seeded if you don’t want as much heat.)
  • 2 tbsp hanapepe salt (i prefer the smokiness of hanapepe, but pink hawaiian or sea salt are good substitutes.)
  • 1 slice high-quality sandwich bread, crust removed, torn into 1 inch pieces
  • 1/2 cup extra virgin olive oil
  • 2 tbsp sherry vinegar
  • 2 tbsp finely minced parsley, cilantro, chives or basil
  • fresh ground black pepper
  • avocado, sliced thin for garnish
  • sour cream, for garnish

roughly chop 2 pounds of the tomatoes, half of the cucumber, half of the bell pepper, and half of the onion. put them in a large bowl with the garlic, chile and 1 1/2 tbsp of the salt. toss until mixed well. set aside.

cut up the remaining tomatoes, cucumber, and pepper into 1/4 inch dice. mince the remaining onion and add to the diced vegetables. toss them with 1/2 tbsp of salt and transfer to a fine-mesh strainer set over a bowl to collect the juices. set aside for 1 hour.

transfer drained diced veggies to a medium bowl and set aside. add the bread pieces to the exuded liquid and let soak for 1 minute. add the soaked bread and any remaining juice to the rough chopped veggies. toss to combine.

transfer 1/2 the veggie-bread mixture to a blender, or food processor, and process for about 30 seconds. then, while blending, slowly drizzle 1/4 cup of the olive oil into the mixture. strain the soup through a fine mesh strainer into a large bowl, or container you are able to cover. using a rubber spatula press the soup through the strainer, until you are basically left with any left over veggie chunks or skin, and discard.

repeat with the remaining veggie-bread mixture and 1/4 cup olive oil. stir in the vinegar, minced herb, and 3/4 of the diced veggies. season to taste with more salt if needed, and black pepper.

cover and refrigerate preferably overnight (or at least 2 hours) to allow the soup to chill completely, and let the flavors develop. serve with remaining diced veggies, avocado, and sour cream as garnish.

i have had bad gazpacho, but nothing as bad as cold campbell’s soup. though, i have to wonder if you have good ingredients and a good recipe, how can it be bad? really.

enjoy!

i grew up eating mostly store bought potato salad that was basically mayo flavored light yellow mush. blech. the potatoes were overcooked and so drenched in mayonnaise, or worse… miracle whip (the horror!), that you could hardly taste any of the other ingredients. so, a few years ago for a 4th of july potluck bbq, i wanted to make a potato salad that you could actually taste the ingredients, including the potatoes, and not just the salad dressing.

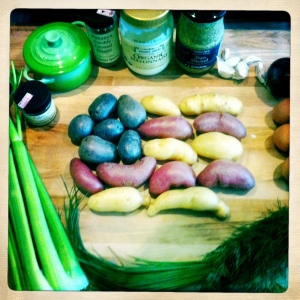
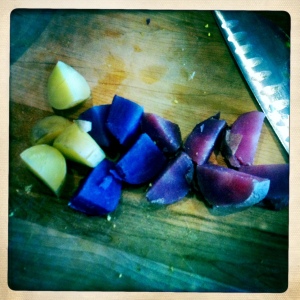
weiser family farms at the farmers markets here in los angeles have great potatoes, and a wide assortment. for my patriotic potato salad i chose chilean reds, russian banana fingerlings, and all blues. i like to leave the skin on the potato, which i feel gives the salad more texture and color. i find if you simply use quality ingredients you don’t need much else to make something taste good, so i kept mine to the basics:

  • 18 small to medium potatoes: a mix of red, white and blue
  • 5-6 celery stalks, diced small (about 1 ¾ cup)
  • 1 medium red onion, diced small (about 1 cup)
  • 4-5 garlic cloves, minced (about  1 tbsp)
  • ½ tsp celery seed
  • 1 tsp salt
  • 1 tsp pepper
  • 5 hard boiled eggs
  • ¼ cup whole grain mustard
  • 1 cup mayo, plus more to your taste
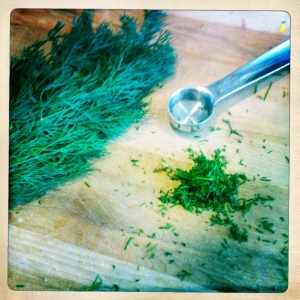
  • 1 tbsp fresh dill, chopped (plus more for garnish)
  • fresh chives, chopped (for garnish)

begin by cooking the potatoes, because they will take a while to cool, but just like the eggs, they can be done ahead of time and cooled in the refrigerator overnight. cover the potatoes with cold water and bring to a boil. as suggested by america’s test kitchen on their blog for week 3 of the “dish it your way” blogger challenge,

“start boiling potatoes in cold water so they come up to temperature slowly and cook evenly. don’t be tempted to start potatoes in already boiling water to speed up the process- it will damage the texture. we also found that the potatoes started in boiling water actually had a longer cooking time than those started in cold water.”

from the time i turned on the heat until they were done was about 20 minutes. to make sure not overcook them i started checking them with a fork at about 15 minutes, remembering that they will continue to cook once off the heat. strain, and let cool completely.

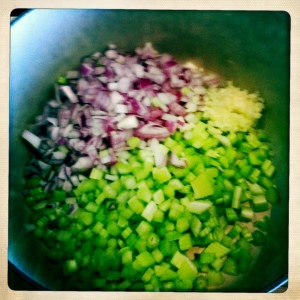
while they are cooling, prep your other ingredients. place the celery, onion, garlic, celery seed, and s+p in a large bowl and mix to combine.

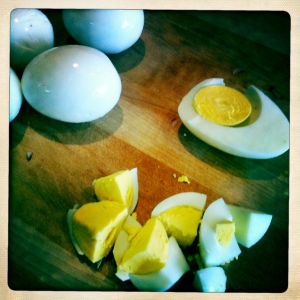
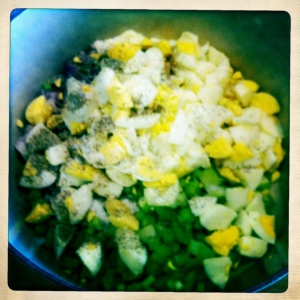
cut up the hard boiled eggs into chunks, and mix them in with veggie mixture.

once completely cooled, cut the potatoes into bite sized chunks, and add to the bowl.

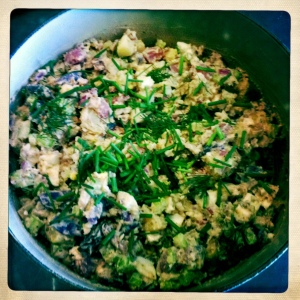
add the mustard and 1 cup of mayo. mix to combine well. add more mayo to your taste. i prefer my potato salad a little on the dryer side rather than swimming in dressing. stir in the fresh dill.

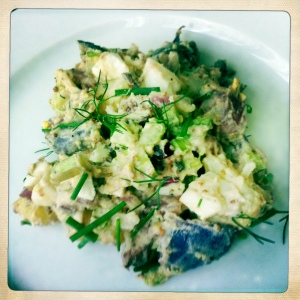
garnish with additional dill and chives.

even though there is nothing fancy about this recipe, i did have two friends remark how they didn’t even like potato salad until they had mine. i think perhaps that they were just accustomed to eating the same mushy light yellow crap i was given growing up, but i’ll take the compliment just the same. enjoy! serves 10-12. 

i love pie…which is actually a gross understatement. i have always preferred pie to other desserts, but it wasn’t until a few years ago that i decided to make my first pie with a homemade crust. it all began while working in griffith park, where there was a quaint little place across the street from where we were shooting called the trails, and it served pie. i collected some money from interested individuals, and bought one of their apple pies. the filling was good, but they chose not to peel their apples, which i personally don’t care for. what was unbelievable was the crust. it was flaky, thick, buttery and ultimately so much better than the filling, that it made me realize…it’s all about the crust. i began my mission to make a pie with the best crust…ever. i have tried a few different recipes, but the one i settled on is pretty much based on the cook’s illustrated version of basic pie dough.

shortly after making my first pie i entered the  kcrw 1st annual good food pie contest. i made a sweet potato pecan pie with jack daniels whipped cream. i didn’t even make it to the 2nd round, but it sure was a lot of fun.

photo courtesy of dennis barth jr.

since then, pies have been my contribution to many a cookout, holiday gathering, and birthday celebration. in fact, i have made several different pies over the past few years, but this is my first plum pie, and it might just be in the running for the 3rd annual good food pie contest.

ingredients

pie dough/crust:

  • 2 1/2 cups all purpose flour
  • 2 tbsp sugar
  • 1 tsp salt
  • 12 tbsp unsalted butter (1 1/2 sticks), cold and cut into 1/4 inch pieces
  • 1/2 cup vegetable shortening, cut into tablespoon sized chunks
  • 3-4 tbsp ice water
  • 3-4 tbsp cold vodka
  • 2 tbsp whole milk, or and an egg beaten
  • 1 tbsp raw sugar (turbinado)

filling:

  • 5 cups pitted plums, sliced and drained
  • 1/2 cup sugar
  • 1/4 cup cornstarch
  • 1 tsp salt
  • 1/8 tsp cloves
  • 1/8 tsp allspice
  • 1 tbsp fresh lemon juice
  • 1 tsp vanilla extract

instructions

make your dough first, so while it chills in the fridge you can make the filling. cut up your butter and shortening, and put it in the freezer, so it is extra cold when making the dough.

while they are in the chillin’ with your frozen goods pull out your food processor. put 1 1/2 cups of the flour, 2 tbsp sugar, and 1 tsp salt and pulse to mix.

by this time your butter and shortening will have chilled enough.  add the shortening.

i use the crisco sticks so it is easier to cut them up into tablespoon sized chunks, but if you use the tub kind, just dollop in equal amounts, and process for about 10 seconds. it will look like coarse sand.

then add the butter pieces, scattering them over the flour mixture.

process again, about 10 1-second pulses. the butter bits should be no larger than the size of a pea. add the remaining 1 cup of flour and process about 4-6 quick pulses.

turn the mixture into medium bowl.

sprinkle in 3 tbsp of the cold water, and 3 tbsp of the cold vodka.

with a rubber spatula using a folding mixing motion, pressing down with the broad side of the spatula as you turn the dough letting it stick together. you will more than likely have to add an additional tbsp each of water and vodka if it isn’t coming together.

divide the dough into 2 flattened circular discs about 4 inches in diameter, and wrap in plastic.

refrigerate for an hour, or up to 2 days, before rolling out.

in the meantime, make your filling. pit and slice up the plums. my plums were especially ripe, so many of them didn’t need to be sliced because they basically became pulp in my hands. let them drain.

whisk the sugar, cornstarch, salt, cloves and allspice together in a large bowl. add the plums, lemon juice and vanilla and mix to combine.

adjust a rack to the middle position and pre-heat oven to 450º.

once you take the dough out of the refrigerator, let it sit for a few minutes, or even more if it has been in longer than an hour. flour your work space and roll out the bottom. christopher kimball, from america’s test kitchen, has an excellent video on his blog as to how to roll out dough.

pour in the filling.

re-flour your work space and roll out the top. cover the filling. trim the edges leaving about 1 1/2 inches hanging over the edge of the pie pan.

fold both layers of dough under.

using your thumb and pointer finger on one hand and your thumb on the other, crimp the edges. (i had to hold the camera, so imagine using all three digits at the same time.)

with a brush wash the top of the dough with milk or egg. cut 6 1-inch slits on the top to vent, and sprinkle with raw sugar.

place on a baking sheet and put it in the oven. reduce the temperature to 375º.

start checking on it at 45 minutes, but mine took just over an hour. the crust should be golden brown.

what’s more american than apple pie, baseball, and fried chicken?

as the 4th of july weekend approaches, it dawned on me that i have made many an apple pie, i have seen plenty of baseball games, but i have never made fried chicken.

when i made my first apple pie, i thought it would be difficult, and although daunting, it wasn’t hard at all.

my apple pie

baseball didn’t appeal to me at one point in my life, mostly because i thought it was uninteresting. growing up in minnesota the twins played in the metrodome, which was frankly a really depressing way to watch a baseball game. there was nothing special about it. when i moved out to los angeles and was introduced to the angels, who play in an outdoor stadium, i was taught about the game, the players, and fell in love with the whole experience.

jeff mathis

my experience with fried chicken has been minimal. growing up it was a bucket from kentucky fried chicken, and even though i liked the crunchy bits on the outside of the skin, i found the actual skin rubbery, and the meat dry with no flavor. it turned me off. over the years i have eaten fried chicken, but none of it ever surprised me. most of it was so greasy it gave me a stomach ache almost instantly. also, i had never really been a fan of chicken until i started eating organic, pasture raised, free-range birds, and especially now that i have been buying whole chickens from the hollywood and santa monica farmers markets, i am a bit spoiled.

so, i thought maybe if i had a good chicken, quality ingredients, and a simple recipe, why wouldn’t i like fried chicken?

you will need a large dutch oven (at least 7 1/4 quart) and an oil/candy thermometer to make this recipe easier.

this is based on a recipe from america’s test kitchen:

ingredients:

  • 1 whole chicken (about 3 1/2 lbs), preferably organic, pasture raised, free range, and air chilled
  • 1 quart buttermilk, set aside 1/2 cup
  • 1 tbsp + 1 tsp salt
  • 3 cups all-purpose flour
  • 2 tsp baking powder
  • 1 tsp fresh thyme, minced
  • 1 tsp hungarian sweet paprika
  • 3/4 tsp black pepper
  • 1/4 tsp cayenne
  • 1/4 tsp garlic powder
  • 4 cups peanut oil

you will need to cut up your chicken into 8 pieces, and then half the chicken breasts to make 10 pieces total. this will make them all roughly the same size. place them skin side down in a baking pan that is deep enough to submerge the chicken pieces.

use 1/2 tbsp salt and sprinkle over the chicken, then flip and sprinkle another 1/2 tbsp over the skin.

pour the buttermilk (minus the 1/2 cup that you set aside) over the chicken. cover with plastic wrap and refrigerate for 1 hour.

whisk flour, baking powder, 1 tsp salt, thyme, paprika, pepper, cayenne, and garlic powder together in a large bowl.

add the 1/2 cup of buttermilk that was set aside, tbsp by tbsp, and mix together with your fingers until it resembles coarse sand. toss each piece of chicken in the flour mixture to coat, gently pressing in order to get as much to stick as possible. don’t worry if it seems clumpy.

transfer to a rimmed baking sheet with a wire rack skin side up.

heat the peanut oil in a large dutch oven until it reaches 375º using a oil/candy thermometer. you will most likely have to do 2 batches, so start with the bigger pieces first like the thicker breast halves and thighs. the 2nd batch would be the legs, wings and the thinner breast halves. the 2nd batch seems to cook quicker, so keep an eye on them, as they will be done earlier.

place pieces skin side down in the oil with tongs and cover. if using a thermometer that clips on the side, the lid will be slightly cracked, which is fine. at about 4 minutes (the oil should register about 300º, adjust heat/burner as needed to keep that temperature) uncover and check if the skin side is golden brown, letting them cook up to 3-4 minutes longer if not, keeping them uncovered. turn them over and cook an additional 6-8 minutes until also golden brown. once all sides are golden i let them get to an even deeper brown by flipping them back and forth a couple more minutes on each side, continually watching.

place paper towels on the wire rack on the rimmed baking sheet you used before. using tongs transfer to drain and let stand for 5 minutes.

in the mean time cook the 2nd batch. heat the same oil back up to 375º and place the remaining pieces in the oil. cover, check and uncover after about 4 minutes, flipping and keeping the oil at about 300º until all sides are equally brown. since these are smaller pieces and not as thick they will cook quicker, so keep an eye on them. transfer to the paper towels and let stand 5 minutes. you can keep the first batch warming in the oven at 200º if need be.

not only were the crunchy bits on the outside perfect, the skin itself was was crisp, and clung to the bits. the meat was extremely moist and not greasy. even the wing, which tends to be the greasiest and most over cooked, had delicious juicy meat. to be honest, for the first time making fried chicken, i was thrilled.

i guess like apple pie and baseball, fried chicken is not only an american tradition, it is easy and wonderful if done right.

the creator of the original recipe for cornell chicken was robert c. baker, a professor and inventor at cornell university, hence the name. oddly enough, he also invented the chicken nugget and numerous other poultry related innovations, which happen to be in the processed food world, so not my favorite innovations. america’s test kitchen’s off shoot cook’s country made some adaptions to the original recipe for the backyard grill:

serves 4 to 6

note: i cut this recipe in half and only used one chicken. it would easily serve 2-4 depending on hunger, and dark meat eaters.

chicken-

  • 2 quarts water
  • 3 1/2 cups cider vinegar
  • 1/4 cup salt
  • 2 (3 1/2 to 4 lb) whole chickens, butterflied and halved

seasoning and sauce-

  • 1 tablespoon poultry seasoning
  • 2 tsp + 1/2 tsp salt
  • 2 tsp  + 1/2 tsp pepper
  • 1/2 cup cider vinegar
  • 3 tablespoons dijon mustard
  • 1 tablespoon chopped fresh sage
  • 1 tablespoon chopped fresh rosemary
  • 1/2 cup olive oil

1. for the chicken: whisk water, vinegar, and salt in large bowl until salt dissolves. add chicken and refrigerate, covered, for 1 to 2 hours. do not brine the chicken longer than 2 hours or the vinegar will make the meat mushy.

2. for the seasoning and sauce: combine poultry seasoning, 2 tsp salt, and 2 tsp pepper in a small bowl; set aside. process vinegar, mustard, sage, rosemary, 1/2 tsp salt, and 1/2 tsp pepper in a blender until smooth, about 1 minute. with blender running, slowly add oil until incorporated. transfer vinegar sauce to a small bowl and reserve for basting chicken in step 4.

3. heat all grill burners on high for 15 minutes, then turn all burners to medium-low. (for charcoal grill, light 75 coals; when covered with fine gray ash, spread evenly over bottom of grill. set cooking grate in plate and heat covered, with lid vents open completely, for 5 minutes.) scrape and oil cooking grate.

4. remove chicken from brine. pat dry with paper towels and rub all over with poultry seasoning mixture.

arrange chicken skin side up on grill and baste with vinegar sauce.

grill, covered, until chicken is well browned on bottom and meat registers 120 degrees, 25-30 minutes, basting with sauce halfway through cooking. baste the chicken carefully, as any excess will drip onto the fire and flare up. also, depending on your grill, times will vary. mine is fairly hot even on low, and reached optimum temperatures quicker. flip chicken skin side down and baste with sauce. continue to grill, covered, until skin is golden brown and crisp and thigh meat registers 170 to 175 degrees, 20 to 25 minutes longer. transfer chicken to platter (do not cover) and let rest 5 minutes. cut into pieces and serve.

honestly the picture doesn’t do the final product justice. it is simply a really easy way to make grilled chicken that results in crispy skin, with tangy, flavorful, and extremely moist meat.

enjoy!

this has been adapted slightly from an america’s test kitchen recipe, and is one of my favorite ways to cook fish. i love to use halibut, but i find since it is breaded, cod works just as well. since the halibut was out of my price range, and the fish guy at the farmers market didn’t have cod, i thought i would try out rock fish. it worked well, but i prefer a fillet that is a bit thicker and flakier.

crunchy breaded oven baked fish

4 (1-1 1/2 inch thick) white fish filets such as halibut, cod, or in this case rock fish, 1/4 to 1/2 lb each

pre-heat oven to 350°.

bread crumbs:

  • 4 slices white sandwich bread, torn up
  • 2 tbsp unsalted butter, melted
  • 1/4 tsp salt
  • 1/4 tsp pepper
  • 1 shallot, minced
  • 2 tbsp parsley, minced

process bread, butter and s+p for 8 one second pulses for coarse crumbs. spread on baking sheet and bake for 15 minutes until brown. toss in shallot and parsley and let cool.

increase oven temp to 425°.

batter:

  • 2 whole eggs
  • 3 tbsp mayo
  • 2 tsp horseradish
  • 1/2 tsp paprika
  • 1/4 tsp cayenne
  • 1/4 tsp pepper
  • 5 tbsp flour

whisk together all ingredients, except flour. add and whisk in flour separately to make batter.

pat fish dry, and sprinkle with s+p on both sides, then:

  1. dredge in flour, and pat off excess
  2. coat completely in batter
  3. pack on bread crumbs

place on a grated baking sheet.


bake for about 18-22 minutes or it registers 140° with a quick read thermometer. serve with tartar sauce recipe below.

tartar sauce:

  • 3/4 cup mayo
  • 2 tbsp capers, minced
  • 2 tbsp sweet pickled relish
  • 1 shallot, minced
  • 2 tsp sherry vinegar
  • 1/2 tsp pepper
enjoy!