Archives for the month of: April, 2011

when i first made homemade chicken stock i could not believe how easy it was. although the process is long, the actual ‘work’ time is short, it makes your home smell incredible for the entire day, and the health benefits are great.

ingredients:

  • 3 lbs of chicken parts, roughly the bones/carcass of (2) 3-4lb chickens
  • gizzards and livers (optional)
  • 2-4 chicken feet (optional)
  • 1 onion, quartered with skin and roots
  • 3-4 carrots, unpeeled with tops
  • 1 garlic bulb, cut in half through the center of the cloves
  • ½ of a bunch of celery, leaves and butt included
  • fresh herbs, several stems of each such as thyme, rosemary, sage
  • 1 tbsp of black peppercorns
  • 2 tbsp apple cider vinegar
  • fresh parsley, several whole stems with leaves

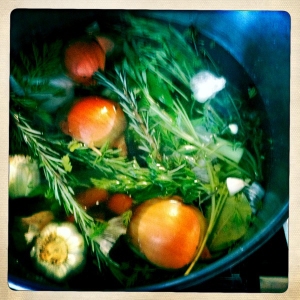
place all the ingredients, except the parsley, in a large stock pot, and cover with cold water. let it sit for 30 minutes to an hour. this allows the vinegar to start extracting calcium and brings the water to room temperature. it is thought that gradual heating brings out flavor.

bring it to a boil.

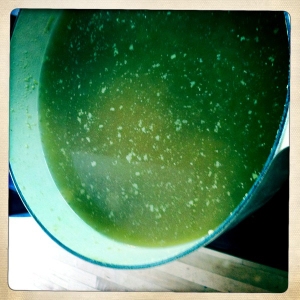
skim off any scum that rises to the top. reduce to a simmer and cover for 6-8 hours. add the parsley about 10 minutes before you take it off the heat. strain the broth through a mesh colander. press down on the veggies, meat, bones, etc to extract any remaining juices. let it cool before letting it chill in the fridge overnight.

skim any fat that has come to the surface.

pour into different sized containers and freeze. this is helpful in the future when recipes require different amounts of stock.

the benefits:

i have based my recipe off “broth is beautiful” by sally fallon, which is a very informative article that tells of the many benefits of making your own stock. among them it says homemade stock has minerals such as calcium, magnesium, phosphorus, silicon, sulphur in a form that can be easily absorbed by the body. it also contains chondroitin sulphates and glucosamine which are known to help arthritis and joint pain, as well as, gelatin that has been shown to treat many different kinds of ailments including diabetes, cancer, and at the very least aids in digestion. back in the day when meat was a luxury item, or even scarce, every part of the animal was used in some way or other. fur and feathers were used for warmth, the meat for nourishment, and the bones were made into stock, but…

“when homemade stocks were pushed out by cheap substitutes, an important source of minerals disappeared…thickening effects of gelatin could be mimicked with emulsifiers but the health benefits were lost.”

i am not sure what the process is for the producers who make boxed and canned stock, but i wouldn’t be surprised if they took short cuts, and that the nutritional value of theirs not matching making your own.

this has been adapted slightly from an america’s test kitchen recipe, and is one of my favorite ways to cook fish. i love to use halibut, but i find since it is breaded, cod works just as well. since the halibut was out of my price range, and the fish guy at the farmers market didn’t have cod, i thought i would try out rock fish. it worked well, but i prefer a fillet that is a bit thicker and flakier.

crunchy breaded oven baked fish

4 (1-1 1/2 inch thick) white fish filets such as halibut, cod, or in this case rock fish, 1/4 to 1/2 lb each

pre-heat oven to 350°.

bread crumbs:

  • 4 slices white sandwich bread, torn up
  • 2 tbsp unsalted butter, melted
  • 1/4 tsp salt
  • 1/4 tsp pepper
  • 1 shallot, minced
  • 2 tbsp parsley, minced

process bread, butter and s+p for 8 one second pulses for coarse crumbs. spread on baking sheet and bake for 15 minutes until brown. toss in shallot and parsley and let cool.

increase oven temp to 425°.

batter:

  • 2 whole eggs
  • 3 tbsp mayo
  • 2 tsp horseradish
  • 1/2 tsp paprika
  • 1/4 tsp cayenne
  • 1/4 tsp pepper
  • 5 tbsp flour

whisk together all ingredients, except flour. add and whisk in flour separately to make batter.

pat fish dry, and sprinkle with s+p on both sides, then:

  1. dredge in flour, and pat off excess
  2. coat completely in batter
  3. pack on bread crumbs

place on a grated baking sheet.


bake for about 18-22 minutes or it registers 140° with a quick read thermometer. serve with tartar sauce recipe below.

tartar sauce:

  • 3/4 cup mayo
  • 2 tbsp capers, minced
  • 2 tbsp sweet pickled relish
  • 1 shallot, minced
  • 2 tsp sherry vinegar
  • 1/2 tsp pepper
enjoy!

this was my first foray into making clams this way, and it turned out so well i will surely do it again. fyi, most clams you get at grocery stores and fine fish markets have already been purged of the sand, but it is always a good idea to ask. also, i have gotten clams from 2 different vendors at different farmers markets and one purges them and one did not. again, it is a good idea to ask. sandy clams are a really good way to ruin a delicious meal.

2 servings:

  • 2 lbs of clams, such as littlenecks, scrubbed and purged
  • 2 tbsp olive oil
  • 1 tsp red pepper flakes
  • 2 cloves of garlic, sliced thin
  • 1/2 cup red bell pepper, 1/2 inch dice
  • 1 cup basic tomato sauce
  • 1/4 cup dry white wine
  • 1/4 cup fresh parsley, chopped fine
  • s+p
  • 4 oz of cooked linguine (roughly 1/4 of a package of dried pasta), boil the water while prepping the other ingredients and the timing turns out pretty well
  • parmesan, grated

in a large sauté pan (with a lid) heat the oil, toss in the garlic, red pepper flakes, bell pepper and cook until soft and golden, about 5 mins. add the tomato sauce and wine and bring to a boil. add the clams, stir around a bit so they are not on top of each other, and put the lid on.

wait for the clams to open. they should open within about 5-8 minutes, and if not throw out the ones that don’t.

use a fork to take the clams out of their shells, toss in the fresh parsley and cooked linguine . add s+p to taste. serve with grated parmesan.

enjoy!

when i get together with my friend john i know at the very least we will talk about food, more than likely we will be eating food, and without a doubt, we will be critiquing food. today we met at father’s office in culver city.

now, i have had the burger once before, and enjoyed it, but i didn’t put much thought into the details. knowing john and i have enjoyed a few burgers together, and discussed good and bad points of all, i figured he would be the perfect person to help bring my thoughts into a concise review. right off the bat, we are both not a fan of the basket presentation, but that did not weigh in on our feelings about the burger itself.

the bun: i thought the french bread roll was a good compliment to the burger. since there wasn’t any sort of crisp toppings like raw onion, lettuce or tomato, i liked the slight crunchiness of the roll. john favors an actual bun.

the toppings: caramelized onions, bacon, gruyére, maytag blue, and arugula. the bacon was somewhat non-existent, there was just a bit too much arugula piled on, and i liked the combination of the two cheeses, but the star of this burger was the caramelized onions. they were reduced down into a compote with a sweetness that almost reminded me of a bbq sauce.

the meat: i ordered mine medium and it came medium. it had good flavor and a good balance of browned on the outside, as well as, pink and juicy on the inside.

the price tag at $12 seems a bit steep, especially since you have to order fries separately. all in all, it was a good burger, and i would order it again, but i might try other things on the menu next time.

i have become more and more inspired by farmers markets, julia child, laura ingalls wilder, and the basics of cooking. ultimately, i would really like to take as much processed food out of my diet as possible. for example, i never have ketchup in my fridge, but a recipe called for 2 tbsp of it, so instead of going to the store and buying a bottle of ketchup, i made my own out of what i already had at my house.

a few weeks back, i had a craving for my grandma’s wild rice casserole. now, it is not a healthy dish by any means, but her recipe calls for canned cream of mushroom soup and canned asparagus (blech). i read the soup label only to discover MSfuckingG in it.

are you kidding me?! i thought that crap was banned by now. regardless, the basic ingredients were simple, so why couldn’t i make it from what i already had in my kitchen: butter, flour, seasonings, broth, milk and mushrooms?

homemade canned cream of mushroom soup
3 tbsp butter
3 tbsp flour
1 tsp poultry seasoning
1/2 cup broth
1/2 cup milk
1/2 cup mushrooms, diced small
s+p

melt the butter.
whisk in the flour, one tbsp at a time.
add poultry seasoning.
whisk in broth.
whisk in milk.
stir in mushrooms.
s+p to taste.
heat until desired thickness.


you’ll have the same amount in a can of campbell’s without all the extra ingredients you don’t need like vegetable oil, modified food starch, dried whey, soy protein concentrate, yeast extract, and monosodium glutamate! plus, it tastes better and took less than 5 minutes to make. it made me think: what other processed food can we just make ourselves? or, what would laura ingalls wilder do?

a version of this post first appeared in my sister kate’s blog smart girls who do stupid things.

the great thing about chicken pot pie is that it can be made with basic ingredients you already have on hand. i like to switch the veggies up a bit here and there, but this is what i did tonight:

  • 1 unbaked double pie crust dough (this should be made first, so you can prep and cook the rest while it is in the refrigerator. if it chills longer than an hour make sure you let it sit out for 5-10 mins before rolling it out.)
  • 1 lb boneless, skinless cooked chicken meat, bite sized pieces
  • 1 1/4 cups carrots, diced
  • 1 3/4 cups fingerling potatoes, diced
  • 1 cup fresh peas, or thawed frozen ones
  • 1/2 cup celery, diced
  • 1 1/2 cups onion, diced
  • 3 cloves garlic, minced
  • 5 tbsp unsalted butter
  • 1/3 cup flour
  • 1/2 tsp salt
  • 1/4 tsp pepper
  • 1/4 tsp celery seed
  • 1/2 tsp paprika
  • 1 3/4 cups chicken stock
  • 2/3 cup milk
  • 1 egg

put the chicken, carrots, potatoes, peas, and celery in a sauce pan. toss in a touch of  s+p and celery seed, and add enough water to cover. bring to a boil for about 15 minutes, or until your veggies are just soft, but not mushy.

let them drain…

in the meantime, you will make the roux (use the same sauce pan if you like) with the remaining ingredients shown below:

cook the onions and garlic in the butter over medium heat until soft and translucent. gradually stir in the flour, add the spices, and then add the stock and milk slowly, stirring continually. simmer over medium-low heat until thick. set aside while you roll out your dough (or, if you are cheating, take your pre-made pie dough out of it’s package, and put in the pie pan.) place the chicken and veggie mixture in the now lined pie pan.

pour the roux over the chicken veggie mixture slowly, making sure it doesn’t overflow…

lay the top pie dough over the filling, trim if necessary, fold both layers under, and crimp. whisk the egg and brush over the top of the crust and crimped edges. make 4 slits with a sharp knife.

bake in a pre-heated oven @ 450° for 45 minutes. let cool for at least 15 minutes, or longer (it’s not to torture you) if you can stand it, before cutting in to it, just so the filling has a chance to set. cut and serve in wedges. enjoy!

(note: i have substituted some of the carrots and fingerlings, for turnips and parsnips, but i don’t see why trying other types of veggies might be interesting too. as long as you end up with roughly 3 1/2 cups of uniformly diced veggies to boil with the chicken you should be good.)

if you are like me and live in a loft condo where there is little to no green space on the property, or have to jump through hoops to get approval from your hoa to utilize communal space as a garden, there are solutions.

the windowfarms project has developed a way to grow fresh fruits, veggies, and herbs in your own home:

even though i do think it would look really cool hanging in my window, it does seem like quite an undertaking, and i worry if i have a green thumb to be successful.

i am also concerned about any possible bpa or other chemicals leaching from the plastic water bottles into the plants. they do state this on their FAQ’s page:

“Some scientists in the community are unconcerned, postulating that the size and complexity of the BPA molecule size and complexity is likely too much for plants root hairs to uptake. To be safe, the community and core team are developing alternatives to the use of plastic water bottles. We are also looking for science-minded volunteers with the appropriate equipment to take-on the challenge of measuring any chemical leaching to verify these concerns.”

so, i did a little research. here is what nestle waters (their 1.5l bottle is the recommended bottle to use in the window farm system) has to say on their ‘are plastic water bottles safe?’ page:

“BPA is not present in our bottled water packaging smaller than three gallons. Our single-serve bottles (typically 1.5 liters and smaller) are made from PET plastic (marked with the “1” symbol), which is flexible and lightweight.”

but then, as somewhat of a disclaimer, at the bottom of the page, they state this:

“The available scientific evidence indicates that bottled water is safe when stored properly and consumed in a reasonable amount of time. We recommend consumers treat bottled water as they would any food product and store it at or below room temperature, out of direct sunlight, and away from solvents and chemicals.”

i’m not ruling this out as an option, but being that window farming is dependent on direct sunlight, and that there are numerous warnings on re-using plastic bottles with a #1 on them, i might just wait for verification, or at least more evidence, that planting in them is safe.

this was extremely simply and produced juicy lemony meat. first you will need to butterfly your bird. then shove about 2 tbsp of salted lemon zest under the skin, sprinkle the skin generously with s+p, and put it in a roasting pan (preferably one that is not aluminum or non-stick, such as glass).

whisk together 1/3 cup fresh lemon juice, 2 tbsp lemon zest, 2 cups of chicken stock, and 1 cup of water. then give the chicken a bath. pour the mixture into the roasting pan until it reaches the sides of the thigh skin.

bake at 475° for about 40 minutes (the thigh meat should register 170°-175°) and the skin is crispy. let it rest on a cutting board for about 20 minutes. i recommend one with a reservoir, because it will ooze juices. while you wait, you can reduce the pan juices down to about a cup, thicken it with a tsp of cornstarch, whisk in 3 tbsp of butter (off heat) and some fresh thyme, and you will have a delicious sauce to put on top.

“find something that you’re passionate about and keep tremendously interested in it.” –julia child